Pages

Monday, November 18, 2013

So thankful

 
I am still alive.
I just have almost no time devoted to crafting lately :(
 
But the upside of having a house on the market is that it is pretty clean! :)
Too bad it takes so long to clean :(
 
A good amount of boxes have been packed. But we still have MANY to go.
Only 4 more weeks left of living in Colorado. In one month we'll be in Washington.
Crazy.
 
I happened to find this photo on my craft table. It is one of the very few that were not packed. I decided to play along with the Thankful theme that  The Paper Girls are hosting.
 
 The background paper is from an old Stampin Up set called Autumn Meadows. The solid cardstock might be River Rock from Stampin Up. And the rust is from a Colorbok pad. From the Simons Says Stamp October card kit I used the chipboard heart, twine, and the woodgrain and arrow papers from Lawn Fawn's Into the Woods.

 The leaves were from a SU die (I'm too lazy to look it up!).
I handwrote the title with a Faber-Castell PITT big brush pen (love those markers).
 
I got to use my new Tim Holts Rays mask with some tinted modeling paste to make these sun rays. I adore modeling paste. I adore stencils. Put them together and I am so happy!
 
It felt good to get my hands messy again :)
 
Thanks for stopping by today!


Monday, October 7, 2013

They fish. I read.

Jessica at The Paper Girls Challenge has challenged us to use some sort of sewing on our project.
Well...I didn't technically sew. But I did use sewing thread and wound it around my page.
I had planned to stitch some lines on the page to journal on too. But I decided I liked the page better without the lines and wanted to leave it simple. I used tiny bits of quick-drying glue along the thread at the ends and where it overlaps itself at the loops.
 I dropped black mist on my page. Used leftover book page leaves from my last project (which happened to just be laying on my desk and were just perfect for a layout about reading!).
 Some gold sequins and a piece of flair. And that was it.
 
Thanks for stopping by today!
 
Make sure you stop by and participate in the Paper Girls' challenge for your chance to win a great crafty prize.


Monday, September 30, 2013

Fall Decor blog hop

 
Welcome to The Paper Girls Challenge blog Fall décor blog hop!

The Paper Girls have some wonderful fall-themed décor projects for you.
 And what's a blog hop without a prize??
We are offering up a $26 gift card to ScrapbookPal.com!

 What do you have to do to participate? 
Complete all 3 of these required steps:
1. Comment on each of our blog posts along the hop
2. "Like" the Paper Girls Challenge on Facebook
3. Follow our blog
Easy peasy, right?
 
 You have until Sunday, October 6, 2013 at 11:59 pm MST to comment. We will announce the winner on Wednesday October 9, 2013 at 9:00 am MST.  As usual, we are only shipping prize packs to the US and Canada due to shipping costs. We really hope to change this in the future.
 
You should have come here by way of Kristy. Wasn't her project great?! I love that she can change it up for the seasons!
 
So, here's my project now:
I used the 3D Letters cut file from svgcuts.com to make these out of cardstock for my mantel.
Seriously. This file makes it so easy to create word, initials, etc. without going out and buying expensive wooden or chipboard letters! I use them a lot :)
 
 
Some close-ups:


Here's a reminder of your hopping order:
 
Amber: www.allamberallthetime.blogspot.com  ....psst You are HERE!
 
So now you are headed over to the ever-so-talented Erica! If you love the tiny bits of book page I used then you will LOVE what she did with her book pages! Thanks for stopping by and hopping with us today. Good luck winning the gift card!


Friday, September 27, 2013

give thanks for all things

 Since I haven't created in so long I decided to whip up a quick little card for this week's Friends with Flair at Unity. It's dark now so the lighting is terrible. Whatever - I made something!
 
 
I used Harvest Of Memories and some stamps that came in a grab bag.
I heat embossed the sentiment in gold. Love it!
 
I've been so scarce on this old blog because we are getting ready to move! We're leaving Colorado and heading to Washington in a couple months. We have lots of cleaning and packing to do. I despise cleaning and packing. :(  I'd rather play with ink and paper :)
 
Wish me luck!
Thanks for stopping by today!

Wednesday, September 4, 2013

Celebrate the Beautiful Moments

Oh, I missed my little blog.
Back-to-school, vacation, trying to sell a house, and some sickness all got in the way!
 
Anyway.
 
I made this little card for The Paper Girls challenge to use wire.
I have been itching for fall to get here. I was also up in the mountains at the family cabin when I made this. Lots of inspiration there!
 
I just love this card. It has so many of my favorite things - spray ink, wood grain embossing, old book paper, leaves and water coloring!
 
 
I stamped, water-colored, and fussy cut all those leaves.
 
I wound some old jewelry wire behind my leaves and sentiment. And I made that little heart paperclip with the same wire.
 
 I hope you can come play along in our wire challenge. Kristy will have a fabulous prize to send out to one random winner.

 
This card is listed in my shop. Take a look here if you are interested!
 
Thanks for stopping by today!
 
 
Supplies:
Colorbok kraft cardstock
SU Woodgrain embossing folder
Mister Huey's Sunset color mist
French Foliage stamp set from SU


Tuesday, August 6, 2013

Glitter decor

The current challenge over at The Paper Girls is to use Glitter! As a mom of 3 boys I don't get to do that often enough!
 
My little niece is decorating her room in pink, white, and black so I thought I would make her some 3-D letters in her initials to decorate her room.

I used this 3-D letter svg file from svgcuts.com to cut the letters out of cardstock.
 
I added some black and white paper, and then a layer of pink glitter paper!

I added some black rolled flowers and a bow to the T and a fabric flower to the R.

 
These are so fun and {almost} easy to make. If you make any of these (and I highly recommend you do) please watch the assembly video. And have lots of quick-drying liquid glue handy. Some letters have way more pieces than others and can be a bit tricky. I used this last year to make all the letters in "Merry Christmas" for my mantel. Talk about time-consuming! But it was well worth it.
 
What would you make with these files? I want to make more seasonal words for my mantel. My sad little mantel needs help. I should do this soon.
 
Thanks for stopping by today!
 
 
I'm linking up to:
 

Friday, August 2, 2013

happy birthday!

These little beauties were made with the Simon Says Stamp Card Kit for July.
 I kept them nice and simple. Stamped the background and then added the cupcakes. The cupcakes took a little time. It is a 4-step process to stamp these things. See stamp here.
I just fussy-cut them and added them with foam adhesive.
Another color variation:
 I made about a dozen of these to have on hand. I thought they would work great for an adult or a kid's birthday.
 
I'm linking up to the Simon Says Wednesday Challenge of Anything Goes.
 
Thanks for stopping by today!


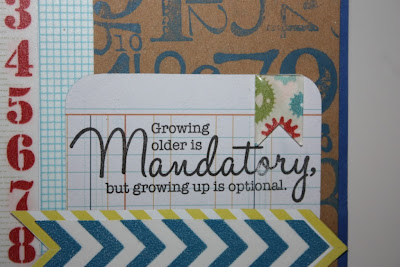
Growing up is optional

Here are my last 2 cards for the Itty Bitty a Day challenge at the Unity {Show & Tell} facebook group.
 
I used Numbers, Etc to stamp the background for this card and added lots of washi strips.
 
This sentiment is from SP & Company. So awesome.
And I added a banner-shaped Epiphany Crafts epoxy.
 (this card is listed in  my shop)
 
This card forced me to use another uninked stamp called You're a real fun-gi. I can't believe I've had it so long and hadn't use it!
I simply watercolored the mushroom. So quick and easy.


Thanks for stopping by today.


Wednesday, July 31, 2013

Itty Bitty Challenge

So...over at facebook I'm in this Unity Stamps group called Unity {show & tell}. Well someone issued a challenge to create one card or tag everyday using an Itty Bitty Unity stamp. So I decided to join in the fun!

 Day 1 card:
I used Direction of Your Heart stamp for this one. I layered some Studio Calico Abroad papers, a couple washi strips, a tag, and a piece of epoxy from Epiphany Crafts.

 
Day 2 card:
I really like this one. I used Direction of Happy stamp right on top of a WRMK Albums Made Easy journaling tag. Added another Epiphany Crafts epoxy and gold mini sequins. Layered over a doily, some MME papers, and Mr. Huey's mist in Passport.

 
Day 3 card:
I used some Colorbok papers as my base layer, fussy cut the LIFE bingo card stamp, added some Offray lace ribbon and a SU die-cut doily, fussy-cut butterfly, and the sentiment is a stamp from a Unity KOM that I can't remember right now.
 
It's been challenging creating every single day. But it's been fun!
 
I'm linking up to Simon Says Stamp Challenge of Anything Goes. WooHoo!!
 
Thanks for stopping by!


Sunday, July 28, 2013

oh hello

Today I've got a little card for The Play Date Café challenge.
 
The challenge is to use black, white, and a splash of neon yellow.
 
I took a black card base, splashed on white mist, a couple layered stickers, and yellow sequins.
 
  Quickest card ever. Only because I thought it was due tonight! It turns out I still have two days.
Well....at least it's done!
 
Thanks for stopping by today!


Friday, July 26, 2013

smile

Here's a quick little card I threw together. Actually, I stamped a bunch of these tags so you will probably be seeing them a lot. :) I'm sure you recognize it from my last post too!
 
 I used one of my absolute favorite Unity stamps called Insightful Meadows. I have almost a bajillion Unity stamps {well, maybe really only a gazillion} but I use this one like 50 percent of the time.
 
I sprayed some mist onto my craft mat and used it as ink to stamp the flowers in three colors.
That smile button that looks like flair is actually an epoxy embellishment I made with my Epiphany Crafts tool. I have been putting those things on everything lately.
 
Since the spray mists are water-based I bet these would qualify for the watercolor challenge over at The Paper Girls dontcha think? Maybe you should come play with us too! I'll have a fab prize up for grabs. :)
 
Thanks for stopping by today!


Monday, July 22, 2013

Water color projects

Hi crafty friends!
I've got several water colored projects today thanks to my current watercolor challenge over at The Paper Girls.
 
First up is this fun layered card. I applied the water color directly to my stamp and stamped several colors onto the tag. Then I layered it over several papers and added the sequins and Epiphany Crafts epoxy.
 
Then I painted my background for this layout using yellow, blue, and tan. I sprinkled some salt onto the tan while it was wet to get some texture on it and rubbed it off once dry.
 
And lastly, I stamped this image and then used watercolor pencils and a water brush to color it in.
 (psst...this card's for sale in my shop)
 
Thanks for stopping by today.
I really hope you will join in on the fun. I've got a prize for one lucky winner!
 
---
I'm linking up to Ronda Palazzari's Create Daily {finally}.

Friday, July 12, 2013

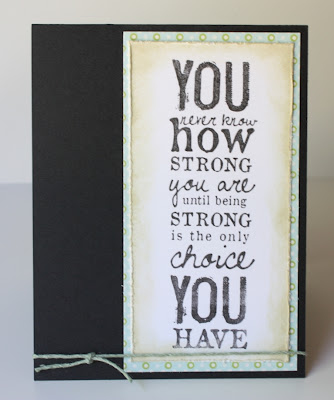
You are strong


Hello Unity friends! And Happy Friday!
 
I loved this stamp as soon as I saw it.
 
 I'm not quite sure what I plan on using this card for but I really like the sentiment and the simpleness of the card design.
 
 
Thanks for stopping by today!


I made more than one and it's for sale in my shop. :)